DIY Garden Decor: 10 Easy Projects Using Recycled Materials
Somewhere in your shed or garage, there's a stack of tin cans, a pallet you meant to use two summers ago, and a pair of boots that never quite dried out. Garden decor rarely needs a shopping trip. It needs a second look at what's already there, and a willingness to drill holes in things other people would throw away. Every project below can be finished in an afternoon, with tools you most likely already own.
Start With Prep, Not Paint
Half the failures with recycled garden projects happen before anything gets planted. Give each container a proper start and it will look deliberate rather than improvised.
- Clean thoroughly. Wash old containers with warm soapy water. Grease, mould and food residue sour soil and stunt roots.
- Drill drainage first. A nail and hammer work on tin; a masonry bit handles ceramic and brick. Three holes minimum, even in something small.
- Sand every cut or rusted edge. Sharp metal catches hands, gloves and watering cans.
- Check pallet stamps. Look for an "HT" mark, which means heat treated. Skip pallets stamped "MB," which have been treated with methyl bromide.
- Seal porous wood. A coat of exterior paint or linseed oil adds years to pallet and crate projects.
1. Tin Cans into Hanging Herb Planters
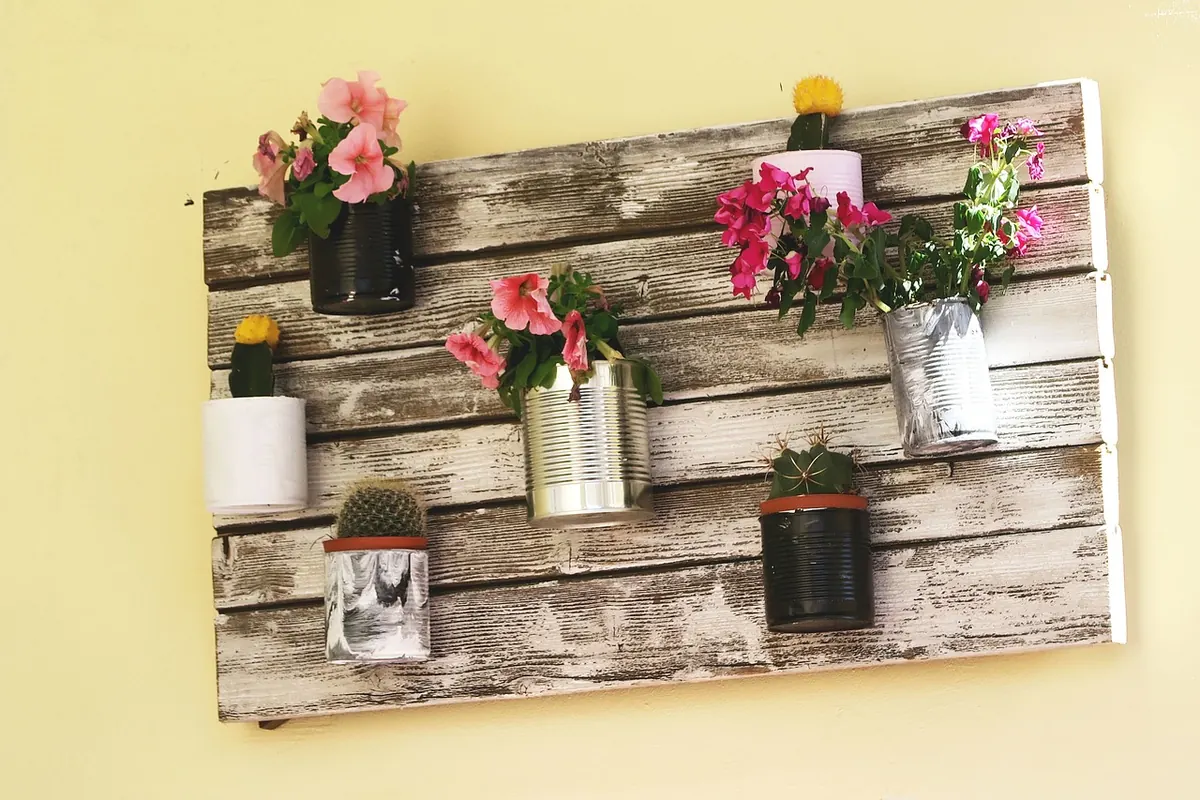
Strip the labels (soaking overnight helps), then punch three drainage holes in the base of each can with a nail. Fill with potting mix and tuck in thyme, chives or oregano. Bend a length of wire into a handle, hook it over a fence post, and hang the cans at eye level so you actually brush past them and remember to snip. One coat of exterior enamel in a soft grey or deep green, cured for a week before planting, makes a row of cans look like a bought set.
2. A Pallet Becomes a Living Wall
Stand a pallet vertically against a sunny wall and staple landscape fabric across the back and along the bottom of each slat gap. Pack the gaps with compost and plant from the top down: sedums and trailing nasturtium near the top, ferns, lettuce or strawberries lower where they'll catch the runoff. Water the top row generously and let gravity do the work. Lean the pallet slightly back against the wall rather than standing it dead upright, so water reaches the lower pockets instead of running straight off the face.
3. The Old Stepladder Plant Stand
Nothing grows a display faster. Leave the paint chipped if you like the look; otherwise a quick sand and a matte coat will do. Set a row of pots on each rung, graduating from large at the bottom to small at the top, and let a trailing ivy or vinca spill over the highest step. In exposed spots, thread a zip tie through each step and around the pot rims — one gust on a wet day and a rung of terracotta is on the patio.
4. Wine Bottle Garden Edging
Push clean, label-free bottles upside down into the soil with a gentle twisting motion, spacing them about 15 cm apart along the curve of a bed. The necks only need to sink a few centimetres; use the depth as your guide to keep the scalloped line even. Clear or dark green glass both look good, and a mix of the two adds texture. Keep glass borders away from paths where children and dogs run, and never hammer a bottle into dry, compacted ground — you're asking for shattered glass.
5. Cutlery Wind Chimes
Mismatched forks and spoons from the back of the drawer make a chime with a soft, low ring. Drill a small hole near the end of each handle (a metal bit and a drop of oil help), then thread each piece onto fishing line and tie it to a driftwood branch or an old metal lid. Stagger the lengths so the pieces don't tangle, and hang the whole thing where it catches a breeze but not a downpour — rain will rust plain steel within a season.
6. Boots, Wellies and Watering Cans
That's the trio of containers almost everyone owns and almost nobody uses. Drill drainage holes through the soles of boots or the base of a leaky watering can, then fill and plant. Rubber boots crack over time, so slide a small plastic bag inside first if the sides are split. Tall boots suit trailing plants; short watering cans suit a single bold hosta or a clump of parsley.
7. Teacup Miniature Gardens
A chipped cup and its saucer make a five-minute project with a big payoff. Put a shallow layer of gravel in the cup, then a spoonful of gritty compost, then one small sedum, a tiny fern or a patch of moss. Set the cup on the saucer to catch drips and place it where you'll see it daily: a windowsill, a step, a shelf on the shed wall. Miniature plantings dry out fast, so keep a small spray bottle nearby and water little and often.
8. Jar Lanterns Between the Beds
Wire-hung glass jars are an easy way to light a path or a seating corner. Wrap galvanised wire twice around the neck, twist a handle, and add a centimetre of sand or pebbles in the base. Battery or solar LEDs are the sensible choice near dry leaves, timber and mulch; an open flame in a glass jar is a fire risk in exactly the places you want lights most.
When Recycled Starts to Look Like Clutter
The line between charming and chaotic is almost always about restraint. Pick two or three materials and repeat them — a run of tin cans, a cluster of jars, nothing else — rather than displaying one of everything you've ever rescued. Group in odd numbers, keep similar heights together, and let one piece be taller than the rest for contrast. Finally, edit each season: if a container has cracked, faded or been colonised by weeds you didn't plant, it has done its job. Compost it or recycle it, and make room for the next rescued thing.
Photo: MBertolotti / Pixabay